
See Your Mural on Your Wall Before You Order
Preview It on Your Wall
Upload a photo of your wall and the mural, enter the real-world dimensions of both, and drag the four green dots to the actual corners of the wall in your photo. The mural drops in at true scale, so you can see exactly what gets cropped, what's left over, and where everything lands — before anything is ordered or cut. It also picks up your wall's lighting for a finished-photo look. If a sloped ceiling or soffit cuts into a corner, add an angled cut so the mural stops exactly at that line instead of spilling onto the ceiling. Add trim strips for any chair rail, baseboard, or crown molding — they'll sit over the mural the way real trim does. Everything runs in your browser; nothing is uploaded anywhere.
Drag the four green dots to the corners of your wall in the photo. The mural updates as you go.
If a sloped ceiling or soffit cuts into a corner, add a cut line and drag its ends onto that edge in the photo. The mural stops there instead of spilling onto the ceiling. Drag the line itself to slide it, click ⇄ to flip which side is trimmed, × to remove.
Add a horizontal strip where trim should sit over the mural. Drag the amber lines to size it. Click the × to remove.
A mural can be the right image and still be the wrong fit.
That happens because the mural has one set of dimensions and the wall has another. When the proportions don't match, something has to give — part of the image gets cropped, the mural stops short of the wall, or the artwork has to shift so the part that matters stays in frame. A mural you fell in love with online might be four feet too narrow for the wall you had in mind, or two feet too tall, or perfectly sized but printed at a scale that dwarfs the room.
This tool lets you see which one you're dealing with before you order. Upload a photo of your wall and the mural artwork, enter both sets of dimensions, and the layout appears at true scale.
A Real One: Nursery Mural, Before and After
A preview tool is only useful if it's honest about what it can and can't tell you. So here's the tool against a real job — the same nursery wall, first bare, then as the true-scale preview, then as the finished install. This wall had real complications: a sloped ceiling cutting into the left side, a window in the lower corner, and a chair rail running the full width. Nothing about it was a simple flat rectangle.
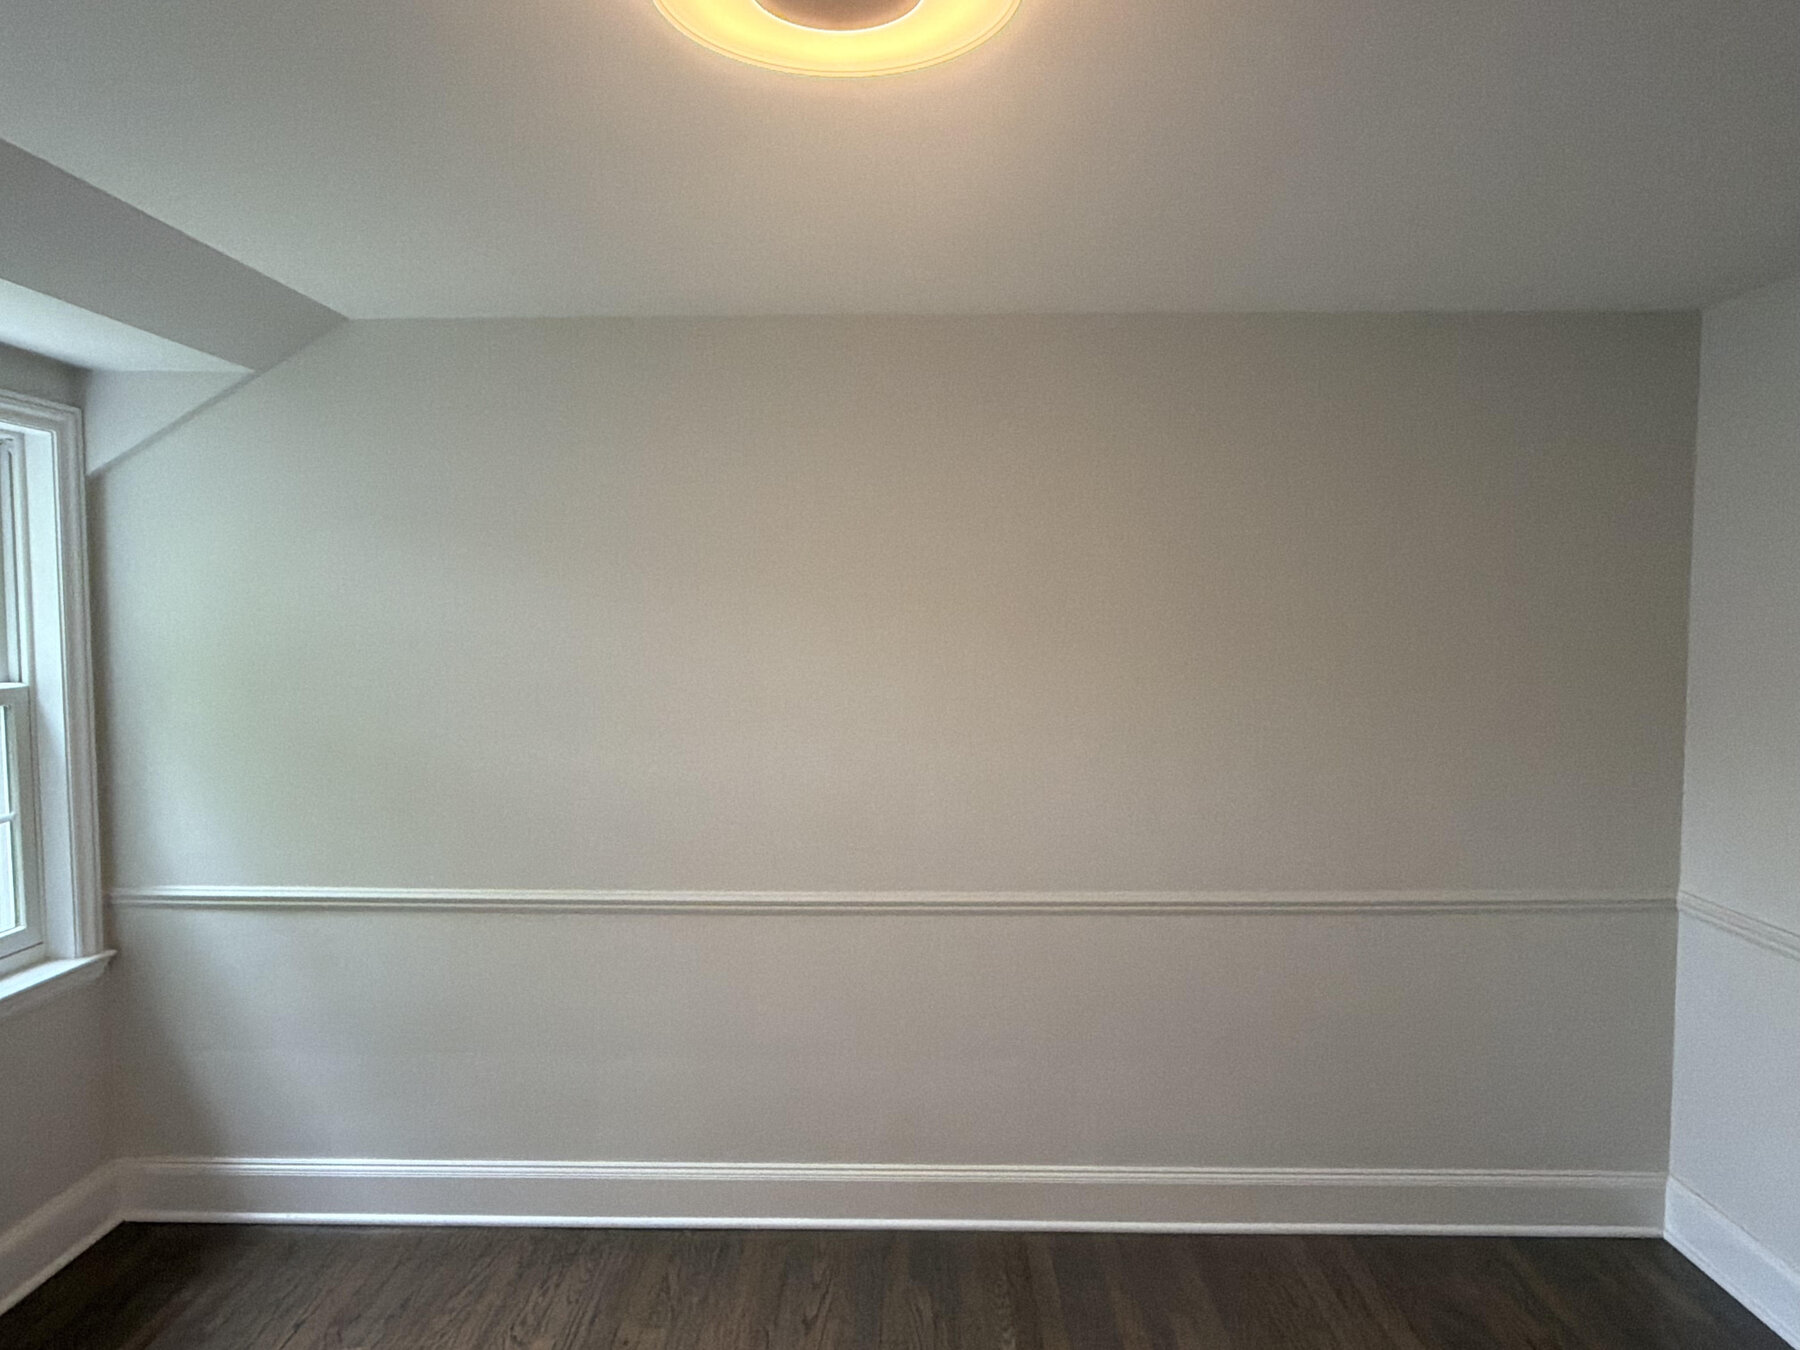
The bare wall. Straight-on, evenly lit, a little ceiling and floor in frame — the same kind of shot the tool above asks for.
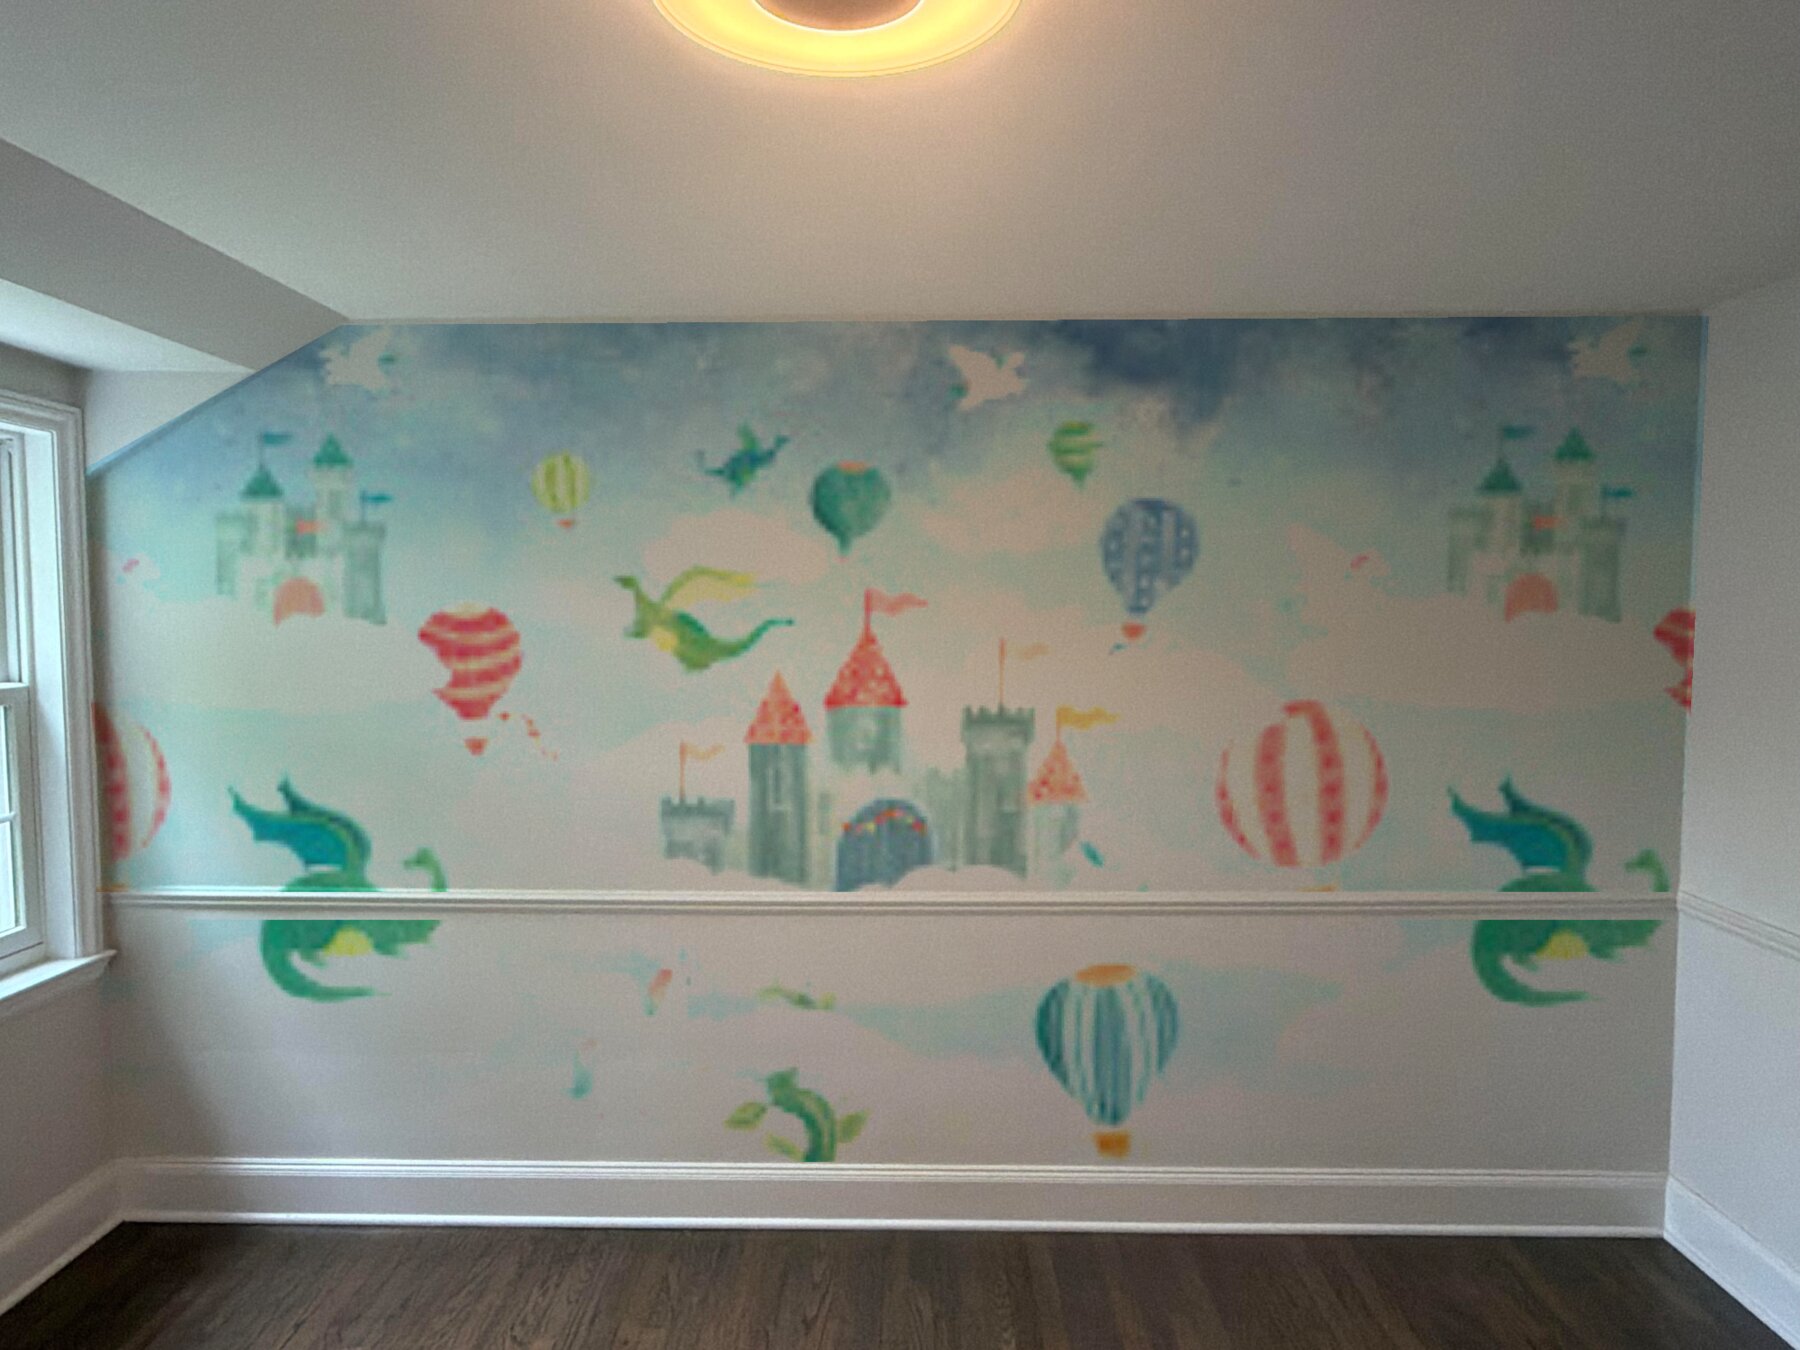
The preview, generated before the mural was ordered — that wall photo and the mural artwork at their real dimensions, with the sloped ceiling handled by the angled-cut control.
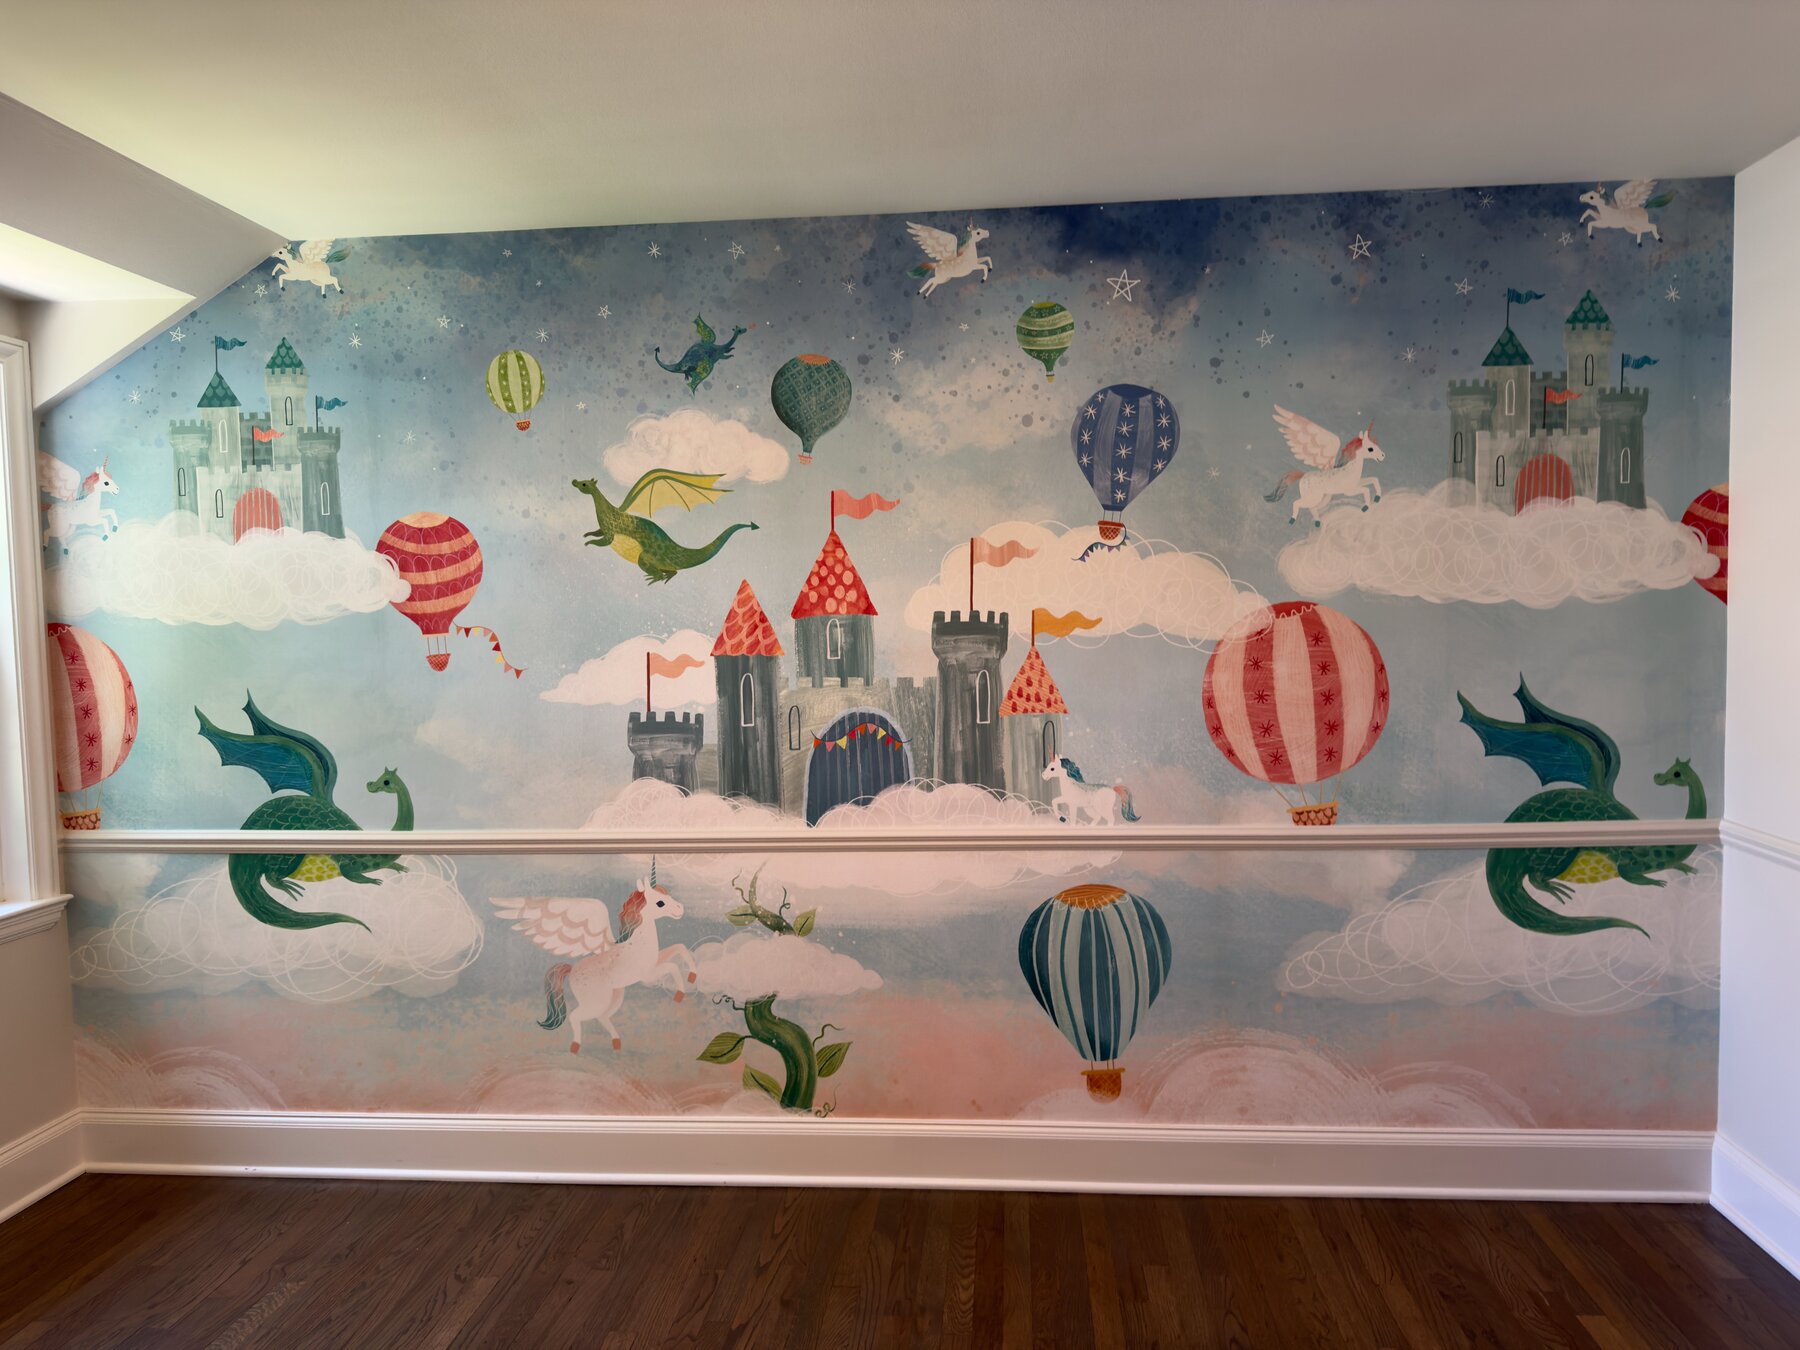
The finished install. Real light, real paper, real seams — and the same composition and soffit line the preview predicted.
What held up: the scale, where the main scene elements landed, and — the part that actually worried us — how cleanly the mural wraps that sloped ceiling instead of getting awkwardly cut off. What only the real install can show: true lighting, the texture of the printed material, and the small hand-finishing decisions made on site. A true-scale preview is a planning tool, not a photograph of the future. Treat it as the first one, not the second, and it does its job.
Why Scale Is the Whole Story with Murals
Traditional wallpaper has a small repeat, so the wall gets covered in the same pattern regardless of the wall's size. Murals are different. A mural is a single scene printed at a specific size. If the mural is 118 inches wide and your wall is 154 inches wide, three feet of wall are left over. If the mural is 118 inches tall and your wall is 91 inches tall, more than two feet of the artwork get cropped.
None of that reads as a problem when you're looking at the mural on a product page. It's only obvious when you can see the mural at real size against the real wall. That's when a client says "the castle is too high — we're going to cut off the towers" or "the whole left side is empty — what do we do with that space?"
Catch that before the mural ships, and you have options. Catch it after the mural ships, and you have a problem.
How to Photograph Your Wall
The preview is only as accurate as the photo. A few rules make a big difference:
- Stand centered in front of the wall
- Not off to one side. Not close to a corner. The more straight-on your shot, the less perspective correction the tool has to do, and the more the preview will look like the real room.
- Include some floor and ceiling
- A little reference around the wall helps you see where the mural will land relative to trim, baseboards, and the ceiling line. If the whole photo is just wall, you lose that context.
- Turn the lights on
- The wall should be evenly lit. Dark shadows across the wall will show through the mural preview and make it hard to judge the color.
- Don't tilt the phone
- Hold the phone level, not angled up or down. If the phone tilts, the wall corners look trapezoidal in the photo — which the tool can correct for, but it's easier to just get a clean shot to begin with.
What "Repeat" Actually Means for a Mural
Some murals are designed as a single scene — a landscape, a chinoiserie garden, a whimsical illustration. These are meant to be seen once on the wall. If the wall is bigger than the mural, the extra space stays blank (or gets a matching paint color, or a companion panel).
Other murals are designed to tile seamlessly. The edges are made to match, so a single design can be repeated horizontally or vertically to fill any wall size. Toile prints and small-scale scenic repeats often work this way.
Look at the manufacturer's product page before you assume the mural will tile. If the description doesn't say seamless repeat, tileable, or something similar, assume it's a single scene and leave the Repeat toggle off in the tool.
When the Mural Doesn't Fit Perfectly
Very few murals arrive exactly sized to a specific wall. There's almost always some mismatch. The question is what to do about it. A few common paths:
- Order a slightly oversized mural and trim
- Many manufacturers offer custom sizing, or standard sizes that overshoot the wall by a few inches. The overhang gets trimmed at the ceiling and baseboard for a perfect edge. This is often the cleanest result.
- Center the mural and paint the surround
- If the mural is smaller than the wall and doesn't tile, treat it like framed art. Center it, and paint the wall a color that complements the mural. This can look intentional and gallery-like if the paint choice is right.
- Order matching panels
- Some manufacturers sell a mural alongside coordinating panels or borders that extend the design. Ask before you assume the mural has to stand alone.
- Choose a different mural
- Sometimes the honest answer is that the mural you love isn't right for this wall. The tool makes that visible early — before the deposit is paid, before the mural is printed, before it's too late to change course.
Verify Before You Order
Murals are usually made-to-order. That means they aren't returnable. Once the print is scheduled, the money is spent whether the mural ends up on the wall or in a closet. Half a day with this tool, up front, is worth every dollar it saves later.
And when the mural does arrive, verify the delivered goods against the sample or proof before installation day. Production runs vary. Colors shift between batches. What you approved on-screen may not be exactly what showed up in the box. Your installer needs to know before the paper is on the wall, not after.
Frequently Asked Questions
How do I photograph my wall for the best preview?
Stand centered in front of the wall and take the shot as straight-on as possible. Include a small strip of ceiling and floor for reference. Turn the room lights on. Avoid tilting the phone up or down. If the photo does end up a little angled, the tool's corner handles will still correct for it — you just drag each corner to a real corner of the wall.
What if my mural is bigger than my wall?
The tool crops the overflow automatically. Use the horizontal and vertical position sliders to choose which part of the mural stays on the wall. The scale readout tells you exactly how many inches or centimeters are being cut off in each direction, so you can decide whether the crop lands somewhere acceptable or whether you need a smaller mural.
What if my mural is smaller than my wall?
You have two options. Turn on the Repeat toggle to tile the mural — this only makes sense if the pattern is designed to repeat seamlessly. If it's a one-of-one scene, leave Repeat off and use the position sliders to place the single instance where you want it. The blank space around the mural is where you would either add framing, a companion panel, or paint.
Does the tool upload my photos anywhere?
No. Everything runs in your browser. Your wall photo and mural image never leave your device. Nothing is stored, nothing is sent to a server.
Which murals are designed to repeat?
Repeatable murals are usually described as tileable, seamless, or a repeating pattern. If the mural is sold as a single scene — a landscape, a chinoiserie, a whimsical illustration — it's almost always intended to be a one-of-one and shouldn't be tiled. When in doubt, check the manufacturer's product page or ask your installer.
Can I use the tool for wallpaper too, not just murals?
The tool works best for murals and large-scale panels where you need to see one specific artwork on one specific wall. For traditional patterned wallpaper — where the repeat is small and the whole wall gets covered — the tool can still give you a sense of scale, but the visual difference between one repeat and many is less useful than for a mural.
What if my wall has a sloped ceiling, dormer, or soffit?
Use the Soffit / Angled Cuts control below the corner pins. Add a cut line and drag its two ends onto the point in the photo where the sloped ceiling meets the flat wall. The mural stops exactly at that line instead of spilling onto the ceiling. Flip the cut if it trims the wrong side, and add more than one cut if the wall is bent in more than one place.